Trail Review: Old Rag Mountain, Shenandoah National Park
Parking: There is a free parking lot at the trailhead. The trail does require a park pass as well as a day-use pass. The Shenandoah park pass is $30 and more information can be found HERE. The Old Rag day-use pass is $1/person and can be purchased HERE.
Distance: 9.4 miles loop
Difficulty: Strenuous/Extreme
This is, as of today, the hardest hike I've ever done! The length, the elevation gain, and the intense rock scrambles make this an extremely strenuous hike. Now, I will note, we were getting passed by some very fit young adults who seemed to be climbing the mountain with ease, so it's all relative. But for the average person, I'd say this trail is quite difficult. But when you do make it to the summit, it feels very rewarding!
The trail to Old Rag starts on the eastern side of Shenandoah National Park. The parking lot and ranger station are actually not even in the park at all. But you will need to purchase a park pass ($30/vehicle) and an Old Rag day-use pass ($1/person) and show it to the ranger at the ranger station prior to starting the journey. There are also a pair of rudimentary bathrooms by the station which are the best you're going to get on this journey. There is one other chance on the trail to use a bathroom, but I was told by my partner, who did use it, that I made a good choice NOT to use it. But more on that later...

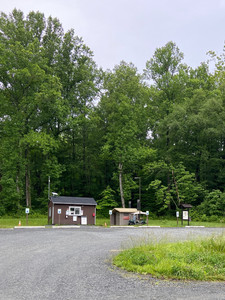


The trail starts to the left of the ranger station at a small bridge that'll bring you over a creek. There is also some signage regarding the trail and a warning about bears.


For the first 0.8 miles, you'll be on the out-and-back part of the trail (as opposed to the loop) and you'll be gaining elevation pretty consistently through dense forest. It was a bit drizzly the morning we started but the canopy from the trees kept us mostly dry. It certainly was muddy though!


The trail has blue painted markers throughout that help indicate you are still on the path. It doesn't really matter too much for most of the trail as it's pretty easy to tell where the path is. But where it will come in handy is at the rock scrambles. We really had to rely on the blue markers to figure out where to climb and the direction to go in. So keep an eye out for those!

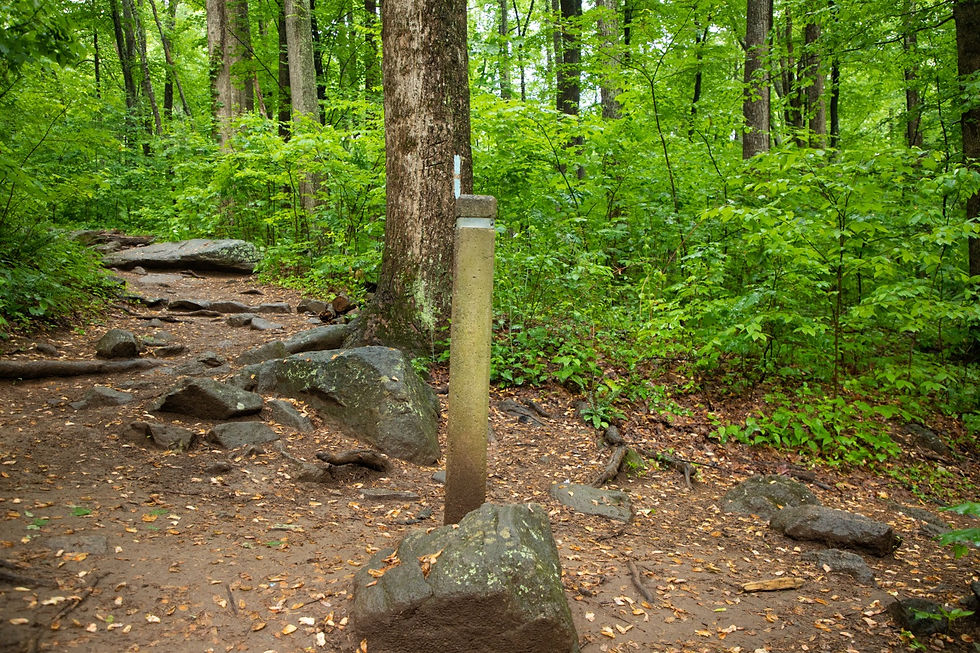
At about 0.8 miles, you'll come upon the trail intersection that starts the loop. Most people do the trail clockwise (to the left) and that is what I'd recommend too, because I would not want to do those rock scrambles going downhill!
There is a cement pole that'll indicate the intersection. When you come to the end of the loop, the pole will be helpful to know where the turnoff back to the parking lot is.
Heading to the left, it's about another 2 miles of normal incline trail before the intense rock scramble section. You'll know you've reached the next section when you pass a "No Camping Beyond This Point" sign and see a set of stairs built into the trail right after. From here on, be prepared to climb, push, and pull yourself along a series of difficult rock scrambles!

The rock scrambles are no joke. Being on the shorter side, I needed a boost on two of them because I couldn't get my leg high enough to get a grip on the rock. There was one sheer drop where you actually have to lower yourself down and we couldn't figure out how to do it until another hiker came by and found a place to put a foot as you descend.
This is where following the blue painted markers becomes very important. You'll want to keep an eye out for them on the rocks because it can be really unclear which way to go otherwise.
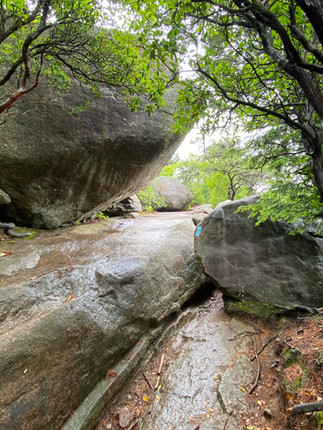
I didn't get photos of the most difficult areas because I was distracted by the intensity but these are a few of the scrambles (which photos don't really do them justice):


After about a mile of pretty serious scrambling, our legs and arms were certainly tired. But then we came upon the summit sign and we were flooded with a sense of accomplishment. The summit of Old Rag is really a bunch of boulders and the areas with vegetation are roped off so that the plants can grow properly (They've been trampled in the past and the NPS is making an effort to revitalize them). Walking out onto the boulders though is totally fine, just be careful by the edges! There are some steep drop offs!


Once done at the summit, it's time to continue the loop and start the descent. It's over five and a half miles down but it'll be more gradual than the way up, plus there aren't any rock scrambles.
Follow the sign for the Saddle Trail. It's two miles on this path and there are quite a few stairs built into the trail to aide in the descent. You'll pass two day-use shelters: Byrds Nest Shelter and Old Rag Shelter. Both are simple buildings with a picnic table or two. The Old Rag Shelter is where the other outhouse is, but as I mentioned before, it might not be worth it unless it's an emergency. It had a horrible smell and I'm sure it gets maintained far less than the ones at the trailhead. Use at your own risk... Other than that, there isn't much to do at these shelters unless you want to stop and sit at a table.


After the two miles on the Saddle Trail. you'll come to a junction with the Weakley Hollow Fire Road. There will be signage pointing you to the right for Old Rag Parking.
The Fire Road is a wide, relatively flat path. It won't be as exciting as the first half of the hike, but you will be following a nearby stream and there is plenty of shade. We also met a cute, little, bright orange lizard which was a fun sighting!


Towards the end of the fire road, the path crosses the stream a number of times (at least 5), but there are bridges built into the trail so no need to worry about getting wet!


You'll eventually come upon a chain gate. We were a little confused at first where to go once we got here but then we saw another set of hikers take a path to the right that went up into the forest and realized that was the path to complete the loop.

Looking at the map now, if you were tired and wanted to just be done, you could continue on the fire road and you'd make it back to one of the parking lots via Nethers Road (a paved road). We followed the hiking trail to the right which took us back to the initial intersection with that concrete post and then back to the parking lot. It's about a mile from the chain gate to the trailhead. There is a bit more uphill this way which wasn't super fun since we were at the tail end of a 9+ mile hike. But we felt accomplished for completing the loop.
Also, I almost stepped on a snake! Keep an eye out for those slithery creatures!

Bottom Line: A difficult, but rewarding trail in Shenandoah National Park. The length and intensity of the rock scrambles are what make it so strenuous.

NPS also has a PDF map to view.

Comments